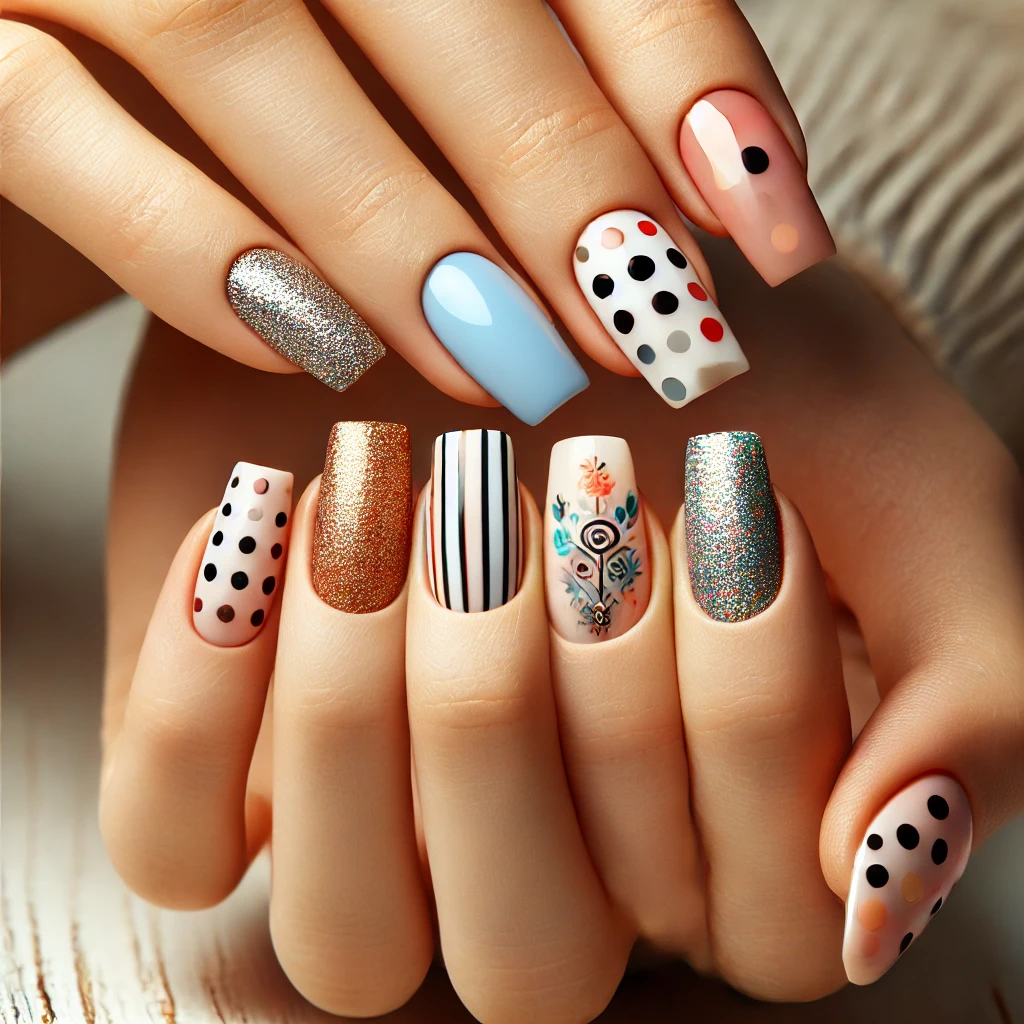
Nail art has become an increasingly popular way for individuals to express their creativity and style. Whether you’re a seasoned nail artist or just starting, there are countless designs that you can create at home with minimal tools and effort. This guide will walk you through some of the best easy nail art designs that you can try yourself, no matter your skill level.
Why Nail Art?
Nail art is more than just a beauty trend; it’s a form of self-expression. Each design can reflect your personality, mood, or even match your outfit. From simple polka dots to intricate patterns, the possibilities are endless. Plus, with the right guidance, you can achieve stunning results without needing to visit a professional salon.
Getting Started with Nail Art
Before diving into specific designs, it’s essential to prepare your nails properly. Here’s a quick checklist:
1. Nail Care: Start with clean, dry nails. Remove any old nail polish, trim and shape your nails, and push back your cuticles.
2. Base Coat: Always apply a base coat to protect your nails from staining and to help your nail art last longer.
3. Tools: Gather some basic tools, including nail polish in various colors, a dotting tool (or a bobby pin), a thin brush, and nail tape.
Once your nails are prepped, you’re ready to start exploring some easy nail art designs.
Polka Dot Nails
Polka dots are a classic and straightforward nail design that adds a playful touch to your nails.
Steps:
1. Apply a base coat and let it dry.
2. Choose a nail polish color for your base and apply it to your nails.
3. Dip a dotting tool or the end of a bobby pin into a contrasting color.
4. Gently press the tool onto your nails to create dots. You can vary the size of the dots for added effect.
5. Once the dots are dry, apply a top coat to seal your design.
Tip: For a modern twist, try using different shades of the same color for the dots.
Striped Nails
Stripes are another easy and versatile design that you can achieve with nail tape.
Steps:
1. After applying your base coat, paint your nails with the color of your choice.
2. Cut strips of nail tape and place them on your nails in your desired pattern.
3. Paint over the tape with a different color.
4. Carefully remove the tape while the polish is still wet.
5. Let your nails dry and finish with a top coat.
Tip:Experiment with diagonal, horizontal, or vertical stripes for different looks.
Gradient Nails
Gradient nails, also known as ombre nails, blend two or more colors seamlessly for a stunning effect.
Steps:
1. Apply a base coat and your first color to your nails.
2. On a makeup sponge, apply two or more stripes of nail polish.
3. Dab the sponge onto your nails, blending the colors as you go.
4. Repeat until you achieve your desired gradient effect.
5. Clean up any excess polish around your nails with a cotton swab dipped in nail polish remover.
6. Apply a top coat to smooth the gradient and add shine.
Tip: Try using colors from the same family (e.g., different shades of pink) for a subtle gradient or contrasting colors for a bold look.
Floral Nails
Floral designs are perfect for spring and summer and are surprisingly easy to create.
Steps:
1. Start with a base coat and your chosen background color.
2. Use a dotting tool or a thin brush to create small dots for the flower petals.
3. Add a dot of a different color in the center of the flower.
4. You can add leaves or other details if desired.
5. Once the design is dry, apply a top coat to protect your artwork.
Tip: Keep the design simple by focusing on one or two flowers per nail.
Glitter Accent Nails
Adding a touch of glitter to your nails can instantly elevate any look.
Steps:
1. Apply a base coat and your chosen color.
2. Select a glitter polish and apply it to one or two accent nails.
3. For a more dramatic effect, you can also apply glitter to the tips of your nails.
4. Finish with a top coat to seal the glitter.
Tip: Mix and match with solid colors and glitter for a chic, balanced look.
Negative Space Nails
Negative space nails involve leaving part of your natural nail exposed for a modern, minimalistic design.
Steps:
1. Apply a base coat.
2. Use nail tape to create shapes or lines on your nails.
3. Paint over the exposed area with your chosen color.
4. Remove the tape while the polish is still wet.
5. Let your nails dry and apply a top coat.
Tip: Try geometric patterns or simple stripes for an eye-catching look.
Animal Print Nails
Animal prints are always in style and easier to create than you might think.
Steps:
1. Start with a base coat and your chosen background color.
2. Use a thin brush or a dotting tool to create irregular shapes for the animal spots.
3. Add smaller dots or lines within the shapes to mimic the texture.
4. Finish with a top coat.
Tip: Leopard spots are a great starting point for beginners.
Abstract Nails
Abstract designs give you the freedom to be creative without following a specific pattern.
Steps:
1. Apply a base coat and your chosen color.
2. Use a thin brush to create random shapes, lines, or dots on your nails.
3. Combine different colors for a more dynamic look.
4. Finish with a top coat.
Tip: The beauty of abstract designs is that there are no rules—let your creativity flow!
Conclusion
Nail art is a fun and creative way to express yourself, and with these easy designs, you don’t need to be a professional to achieve beautiful results. Whether you prefer simple stripes, playful polka dots, or elegant gradients, there’s a design here for everyone. All it takes is a little practice and patience, and you’ll be able to create salon-worthy nails at home.
For those who want to explore more about nail art and its history, the Nail Art provides a comprehensive overview of this popular beauty trend


