When it comes to nail art, few color combinations are as classic and versatile as black and white. The contrast between these two shades creates a striking effect that can be both bold and sophisticated. Whether you’re looking for something minimalistic or daring, black and white nail designs offer endless possibilities for expressing your style.
In this article, we’ll explore various black and white nail designs that you can easily recreate at home. From simple patterns to more intricate details, these designs will elevate your nail game to a new level of elegance.
The Appeal of Black and White Nail Designs
Black and white nails are a favorite among fashion enthusiasts for several reasons:
1. Timelessness: Black and white is a classic color combination that never goes out of style. It can be chic and modern or vintage and retro, depending on the design.
2. Versatility: These colors work well for any occasion, whether you’re dressing up for a formal event or keeping it casual. They also pair beautifully with any outfit.
3. Bold Contrast: The stark contrast between black and white makes any design stand out, even the most subtle ones.
With these benefits in mind, let’s dive into some stunning black and white nail designs that you can try yourself.
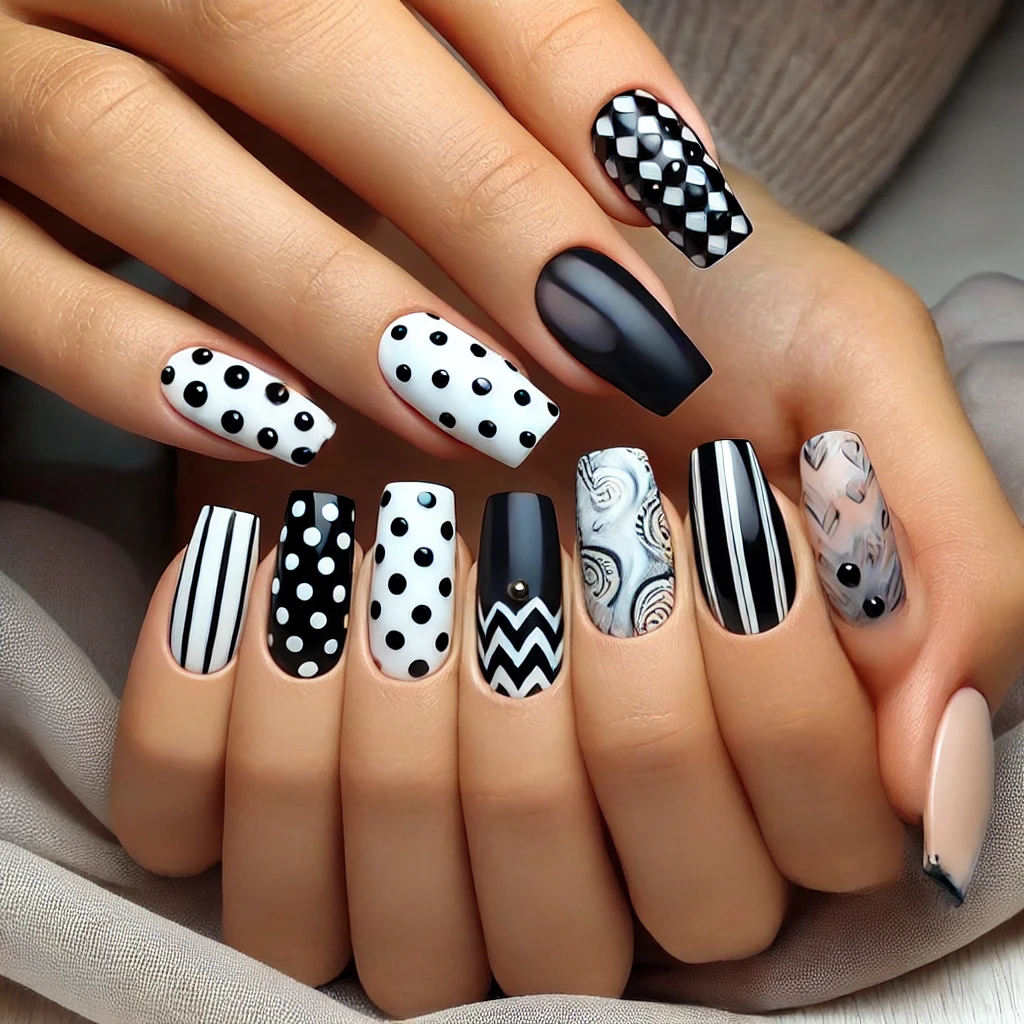
Polka Dot Nails
Polka dots are a fun and playful design that is easy to achieve and looks great in black and white.
Steps:
1. Apply a base coat to protect your nails.
2. Paint your nails with a white base color and let it dry completely.
3. Use a dotting tool or the end of a bobby pin dipped in black nail polish to create evenly spaced dots on your nails.
4. Alternatively, you can reverse the colors by using a black base and white dots.
5. Finish with a top coat to seal the design and add shine.
Tip: To add a twist, try varying the size of the dots or creating a gradient effect with the dots getting smaller as they move down the nail.
Striped Nails
Striped nails are a sleek and stylish option that can be easily customized to suit your taste.
Steps:
1. Start with a base coat, then apply a white or black base color.
2. Once dry, use striping tape to create straight lines across your nails.
3. Paint over the tape with the opposite color (black on white or white on black).
4. Carefully remove the tape while the polish is still wet to reveal clean, sharp lines.
5. Apply a top coat to protect your design.
Tip: Experiment with different directions for the stripes—horizontal, vertical, or diagonal—for a unique look.
Chevron Pattern
The chevron pattern is a trendy design that adds a touch of geometric flair to your nails.
Steps:
1. Apply a base coat and a black or white base color.
2. Use chevron nail guides or create a V-shape with striping tape on each nail.
3. Paint over the guides with the opposite color.
4. Gently remove the tape or guides while the polish is wet.
5. Let your nails dry and finish with a top coat.
Tip: For a more dramatic effect, add glitter accents or combine the chevron pattern with other designs like stripes or polka dots.
Negative Space Nails
Negative space nails incorporate your natural nail into the design, creating a modern and minimalistic look.
Steps:
1. Apply a base coat.
2. Use striping tape to outline the areas of your nail you want to leave bare.
3. Paint the exposed areas with black and white polish in your desired pattern.
4. Remove the tape while the polish is wet to reveal the negative space.
5. Apply a top coat to protect the design.
Tip: Try combining different shapes like triangles, stripes, or half-moons for a creative negative space manicure.
Black and White Floral Nails
Floral designs aren’t just for spring; they can be adapted into chic black and white designs as well.
Steps:
1. Start with a base coat and a white or black base color.
2. Use a thin brush or a dotting tool to create floral shapes with the opposite color.
3. Add details like leaves or dots to enhance the design.
4. Finish with a top coat to seal your floral art.
Tip: Keep the design simple by focusing on one or two flowers per nail or opt for an accent nail with a full floral design.
Marble Nails
Marble nails are an elegant option that gives your manicure a luxurious feel.
Steps:
1. Apply a base coat and a white base color.
2. Mix black polish with a bit of clear polish to thin it out.
3. Use a thin brush to create marble-like veining on each nail.
4. Lightly blend the lines with a sponge or a brush dipped in acetone to soften the look.
5. Finish with a top coat for a glossy, marble-like finish.
Tip: Add a touch of gold or silver polish to enhance the marble effect and give your nails a more opulent look.
Checkerboard Nails
Checkerboard nails are a bold and retro design that makes a statement.
Steps:
1. Apply a base coat and a white or black base color.
2. Use striping tape to create a grid on your nails.
3. Paint alternating squares with the opposite color.
4. Carefully remove the tape while the polish is wet.
5. Finish with a top coat to protect your checkerboard design.
Tip: You can also try a more abstract checkerboard by varying the size or spacing of the squares.
Conclusion
Black and white nail designs are the epitome of elegance and versatility. Whether you prefer simple polka dots, sophisticated stripes, or intricate patterns, these designs offer something for everyone. With just a few basic tools and a little creativity, you can achieve stunning nail art that complements any outfit and occasion.
For more inspiration and to learn about the history and different techniques of nail art, check out the Nail Art